
Oil Separator General Installation Guide
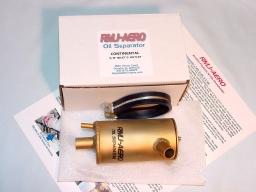 Thank you for purchasing the RMJ-AERO oil separator. These units are fashioned after the proven separator in "Tony Bingelis On Engines", book available from the EAA and other sources. There are many reasons for installing a separator, some of which are, reduced oil consumption, a "cleaner" airplane, and even helping keep our environment clean. The oil vented overboard has to end up somewhere, and it is in the air we breathe. These units are easy to install, hand crafted from aircraft quality materials, glass bead blasted, corrosion coated (golden color), easily maintained, and will work on engines up to 360 Hp with dry vacuum pumps. There are several ways in which the RMJ-AERO oil separator can be installed and piped. Each is unique to the individual aircraft and engine combination as well as mounting location. The oil return line routing and locations are equally unique with respect to the type of engine installed. Therefore, the separator is shipped without fittings, tubing, clamps, etc. Listed below are some suggestions and ideas for your installation.
Firstly, a bit of information you should be aware of concerning moisture and contaminants returned to the engine oil sump. Moisture, which is in the engine oil, is driven out when the oil temperature reaches 180 degrees or more. The water in the oil sublimates (opposite of condensates) into water vapor and exits the engine breather line. It takes with it, water-soluble contaminants and acids. If your oil temperature never reaches 180 degrees, the moisture never leaves the crankcase. You must know that nothing goes back into the oil sump that was not already there. Contaminants like carbon from fuel and lead remain in the oil, as these are functions of the oil.
Installation Guidelines - General Information for All Separators
- Because the separator relies on gravity, you must mount the unit as high in the engine compartment as practical. Determine the location of the separator, be it firewall or baffle mounted. Do not merely mount the unit in-line without adequate support. The separator must NOT be supported solely by hoses. It will vibrate too much and could cause a catastrophic failure. NOTE! There must be NO interruption in the downward slope of the oil return line from the separator to the connection point on the engine.
- The discharge end of the breather line from the separator must be located in a low pressure area. This location and routing usually determines the oil return line routing and the attachment to the engine point.
- CRANKCASE BREATHER ICING PROTECTION. There have been several AD's issued over the years concerning frozen breather lines which resulted in blown crankshaft seals in order for the engine to vent to the outside. That is because the reported icing occurred at the tip of the breather line where it exits the airframe into the slipstream. This resulted in an FAA flight safety recommendation for all aircraft. The alternate exit would be a 1/4" diameter hole drilled 6" - 9" above the point at which the breather line leaves the cowl.
- Before cutting the existing breather line or during the installation of a breather line on your new plane, check the position again. Determine how and where the separator will be located and clamped in position. All RMJ-AERO separators have a cushion clamp supplied for easy mounting to either the firewall or baffling.
- In existing and or crowded installations the breather line from the engine to the separator intake may need to be relocated to a new position. This line should pitch down toward the engine connection point for draining oil back to the engine. This will help prevent buildup of oil in the line and possible blockage, again resulting in a blown crankshaft seal.
- It is recommended that you operate your engine at the full oil capacity as indicated by the manufacturer. This level of oil will provide maximum cooling, lubrication, and cleaning. The separator will prevent major loss of oil. There should be little or no oil left in the breather air exiting the outlet tube, which would be deposited on the belly.
- Do not use this unit if your engine utilizes a wet vacuum pump. This unit is intended for engine crankcase breather applications only.
- MOST IMPORTANT. If an ailing engine you have, don't look for this or any separator to fix it. If for instance you have a bad oil ring on one or more cylinders, you will be pressurizing the crankcase. This will result in higher than normal oil consumption. It is possible to have a normal compression test and still have a bad oil control ring, which is another issue entirely. So, if after you install any oil separator, you still have a high oil consumption rate, check for other problems within your engine.
Click on these links to see specific installation guides.
RMJ-AERO Pages
[RMJ-AERO Main Page]
[Oil Separator]
[Custom Fabrication Services]
[General Installation Guide]
[Separator Maintenance]
[Aerobatic Elbow]
[Continental Installation Guide]
[Continental Clamp On Adapter Installation Guide]
[Lycoming Installation Guide]
[Lycoming Clamp On Adapter Installation Guide]
[Prices & Warranty]
[RMJ-AERO Gallery]
RMJ-AERO
Aviation Products for the Homebuilder
402 Tyrone Drive
Forsyth, IL 62535
E-Mail:
info@rmjaero.com
|

Join & Support The EAA And Your Local EAA Chapter
God Bless The USA
|
 Thank you for purchasing the RMJ-AERO oil separator. These units are fashioned after the proven separator in "Tony Bingelis On Engines", book available from the EAA and other sources. There are many reasons for installing a separator, some of which are, reduced oil consumption, a "cleaner" airplane, and even helping keep our environment clean. The oil vented overboard has to end up somewhere, and it is in the air we breathe. These units are easy to install, hand crafted from aircraft quality materials, glass bead blasted, corrosion coated (golden color), easily maintained, and will work on engines up to 360 Hp with dry vacuum pumps. There are several ways in which the RMJ-AERO oil separator can be installed and piped. Each is unique to the individual aircraft and engine combination as well as mounting location. The oil return line routing and locations are equally unique with respect to the type of engine installed. Therefore, the separator is shipped without fittings, tubing, clamps, etc. Listed below are some suggestions and ideas for your installation.